

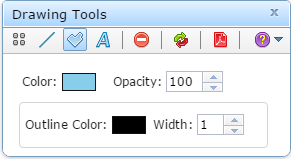
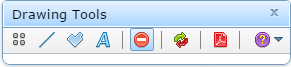
Drawing Tools
Mapper includes the ability to draw various graphics within the map view. These tools to draw the graphics are:
- Draw Point (
 ): Draw a graphical point on the map.
 - Draw Line (
 ): Draws a click-based line on the map.
 - Draw Polygon (
 ): Draws a polygon on the map.
 - Draw Text (
 ): Draws text on the map.
 - Delete Graphic (
 ): Click on an individual graphic to delete it from the map. Can also delete multiple graphics.
It is important to note that these graphics only remain in your current Mapper session. They are permanently removed once you close the Mapper. Once you have drawn graphics, you can toggle them on and off with the Toggle Graphics On/Off ( ![]() ) button. Although currently under development, you will soon be able to save the map as a pdf with the Print/Save Map (
) button. Although currently under development, you will soon be able to save the map as a pdf with the Print/Save Map ( ![]() ) button.
) button.
Draw Point
 Navigate and zoom to the area of interest.
- Turn on any helpful layers.
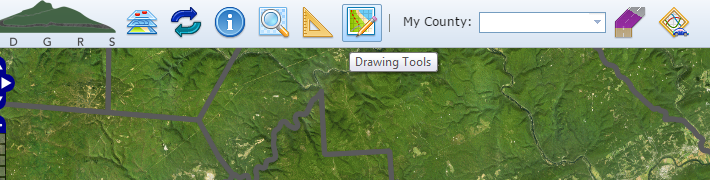
- Click the Drawing Tools button to open the tools dialog.
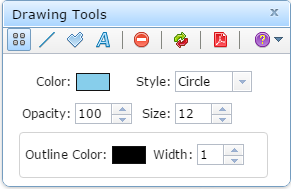
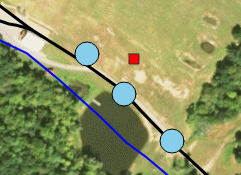
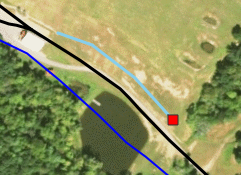
- Click the Draw Point ( ) button. The dialog’s contents will change as shown on the right. Your cursor will change to a red square (
 ).
).  Select the attributes you desire before you draw the point. You can choose the color, style, opacity, and size of the point and the color and width of the point’s outline. Note that these attributes define any points drawn after the attributes have been selected. Changing attributes will not alter any previously drawn points.
- Single click the left mouse button to draw the point. The selected point will be drawn with the attributes you selected.
Draw Line
 Navigate and zoom to the area of interest.
- Turn on any helpful layers.
- Click the Drawing Tools button to open the tools dialog.
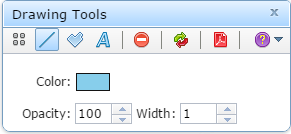
- Click the Draw Line ( ) button. The dialog’s contents will change as shown on the right. Your cursor will change to a red square ( ).
 Select the attributes you desire before you draw the line. You can choose the color, opacity, and width of the line. Note that these attributes define any lines drawn after the attributes have been selected. Changing attributes will not alter any previously drawn lines.
- Begin by clicking with the left mouse button at the desired start point. Then drag the mouse and single click where a direction change will take place. The drawn length will be represented by a solid red line. Double-click the mouse when finished. The selected line will be drawn with the attributes you selected.
Draw Polygon
 Navigate and zoom to the area of interest.
- Turn on any helpful layers.
- Click the Drawing Tools button to open the tools dialog.
- Click the Draw Polygon (
 ) button. The dialog’s contents will change as shown on the right. Your cursor will change to a red square ( ).
 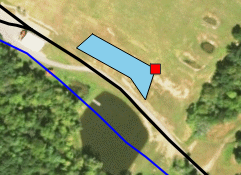 Select the attributes you desire before you draw the polygon. You can choose the color and of the polygon and the color and width of the polygon’s outline. Note that these attributes define any polygons drawn after the attributes have been selected. Changing attributes will not alter any previously drawn polygons.
- Begin by clicking with the left mouse button at the desired start point. Then drag the mouse and single click where a direction change will take place. The drawn area will be represented by a solid red border. Double-click the mouse when finished. The selected polygon will be drawn with the attributes you selected.
Draw Text
 Navigate and zoom to the area of interest.
- Turn on any helpful layers.
- Click the Drawing Tools button to open the tools dialog.
- Click the Draw Text (
 ) button. The dialog’s contents will change as shown on the right. Your cursor will change to a red square ( ).
 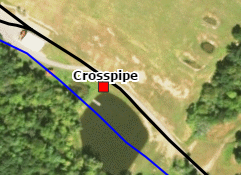 Enter the text you wish to draw. In the example shown on the right, “Crosspipe” was entered. Note that this attribute defines any text drawn after the text has been entered. Changing the text will not alter any previously drawn text.
- Single click the left mouse button to draw the point. The selected text will be represented by the text you entered.
Delete Graphics
 Navigate and zoom to the area of interest.
- Click the Drawing Tools button to open the tools dialog.
- Click the Delete Graphic (
 ) button. The dialog’s contents will change as shown on the right. Your cursor will change to a red square (
  ).
). - Click on a graphic to delete it. Hold down the CTRL key to avoid a confirmation message with each deletion.


